Friday, March 27, 2015

Sharing Some Of My Favorite Things...


Hi there! I hope all of you are having a very happy start to this spring season! 
As soon as I start to see the first signs that spring is on it's way, I dig out 
 my Easter decorations  and start by decorating this little Easter tree that my 3  babies and I always decorated every year since they were little. 

Such sweet memories of decorating the Easter tree, dying eggs and hanging plastic eggs outside on our trees in the front yard! I wouldn't trade those memories for anything in the world!! 
Austin and I still dye eggs and after he leaves my nest, no doubt, you will find me dying them alone until I get some new little hands in my kitchen to help me!! <3
 I thrive on such traditions!!

They make my heart happy <3


Speaking of things that make me have a happy heart,  let me share a few of my favorite things with you...

~ My Dishes~


I am madly in love with collecting beautiful dishes!! 

Each one of my collections is special to me, I don't think I can pick a favorite. 

I'll show you what I mean... 
~My Wedding China~
1989

This was my very first dish collection! I chose this pattern when I was newly engaged to Anthony.  I couldn't wait to make my first little "Home Sweet Home" and  serve suppers on my beautiful dishes. I couldn't cook a thing back then, so in the beginning, these plates  had some pretty bad tasting meals on them! Thankfully, I finally did learn to cook and was able to serve some of my family's favorites on them in the years to come.  


Years later, when my babies were little, I was given this set of special China that once belonged to a sweet lady in my home congregation.  


When I was a younger bride, money was very tight. I came home to my little humble but happy home and on my front porch was a huge basket full of these dishes all wrapped up in tissue paper with a sweet note.  She was  passing them from her home, to mine. <3   

I couldn't believe my special gift!! 

It turned out that my mother had a matching set of these and decided to give me her collection as well, so this turned out to be my largest and most used set of dishes because I have more of them. A bigger crowd can be served on these.  I love the story behind these classic black and white dishes! 

What a special gift!  
Thank you to Mrs. Angie Hall and my sweet Mama! 


~My Depression Glass Collection~
"Pink Dogwood"


I LOVE these dishes and the story of Depression Glass!  

These were originally my mother-in-law's collection. She decided that she wanted to sell them and when Anthony heard they were up for sale, he bought them for me so that I could add them to my collections! <3

In case you don't know the story of Depression Glass, let me fill you in...

During the Great Depression in the late 1920's-1930's, it was a rare thing for housewives to actually shop for China or tableware.  They were barely surviving during this time, so things like buying dishes was unheard of!  
Manufacturers found a way to produce cheaply made glassware for very little costs and decided to have promotional giveaways in which housewives could purchase a box of Quaker Oats or laundry soap and open up the box to find a piece of yellow, pink, blue or green glassware.  Then, she might go have her car filled with gasoline and the attendant would give her another piece of glassware to add to her collection.  The giveaways were promotional items given  to encourage women to eventually go out and purchase the remainder of their sets. 

So... my Depression Glass really has  some history behind it! 

I would love to know who all owned it before me!  It's so much fun to look for pieces and to imagine the dinners once served from these plates over the last 85 years or so!! 


~My Everyday Dishes~

RED...


I got these for a super bargain!
I used coupons and Kohl's cash along with them being on sale and  paid just under $7.00 TOTAL  for the set of 8 plates!! 

If you didn't know this about me already, I will tell you, 
 I love couponing and bargains!! 


Speaking of  bargains, my latest addition to my dish collection...

I found these blue jewels at a yard sale last weekend for $26!! 
The set included 15 plates, one small bowl and 6 cups and saucers!

~ <3 ~


I'm in love with these!! 

I realize that I may have a bit of an obsession with dishes.  

Just a tiny one... ;)

As soon as I got home from the yard sales, I washed these beautiful dishes and couldn't wait to "play" with them by setting a springtime table just for fun! 


I decided to use only white and blue for this table setting. 
I don't own a white tablecloth large enough for my dining room table, so I ironed a white flat bed sheet that I only use for a tablecloth.  Then, I added my new blue dishes, using the small  bowl filled with eggs from my fridge as a centerpiece.  By the way... these tea glasses were also a yard sale purchase along with the silver flatware.  On our work travels, years ago, we stopped at a yard sale in Kentucky and found the silver in the original wooden case for $12.00!! 

I told you, I am a bargain hunter! ;)

I thought it turned out to be a very simple, but pretty spring table setting.

Whenever I set a table for "sit down company", I always use this book from Southern Living called "Cooking For Company" to help me remember the proper way to set out my silverware.


Here on page 3 is this simple instruction sheet that I follow...


I never remember which fork is for salad!  (It's the smaller one) ;)

Here's a sample of a little less formal version of a proper place setting...


One more favorite of mine, that I always use, is cloth napkins!  

They are washable, softer, more durable and less expensive than paper ones.

They are for sure near the top of my favorites list!


If you don't yard sale or antique, I highly recommend you give it a try!  

You might just find some of your favorites out there for a very good price!

Happy Hunting!!


~ <3~

Psalms 34:3 "O magnify the Lord with me, and let us exalt his name together." (KJV)


Monday, March 16, 2015

A Gift I Will Treasure Always...

I hope all of you have had a great Monday! I have had a very busy one, but it's been good. The weather here in Alabama has been just beautiful!! I hope it has been beautiful at your house too! 
 
Today, I wanted to blog about a very special gift I received.  
One that means the world to me!

My sweet husband (Yes, I did say sweet!), made me a 
Handmade Farm Table!!!  
 ~<3 ~ <3 ~ <3~


I have wanted one of these for so long!!!! 
 
I absolutely LOVE it!!! 
 
I love that it's patterned after an old farm table! I love that my family can eat off of
 a table that their Daddy made! I love it that he built it with his own hands and I love his natural talent to do anything he sets his mind to!

He is such a blessing to me...

I snapped a few pictures of he and Austin working together.


I am just so thankful that they were able to work on this together and that Austin has his daddy's love for woodworking! 
 
Here's my end table that Austin built for me too...
"Like Father Like Son"


I pray these memories will never fade...


Thank you both for my special gifts!! <3
 
If you or someone you know is interested in their custom built tables, you can check out Austin's website at www.handmadetables.weebly.com
 
 
  ~ Joshua 24:15 "... but as for me and my house, we will serve the Lord." (KJV)

Thursday, February 26, 2015

Pot Roast... A True Comfort Food

As so many of you are waking up to snow, I'm sure that this recipe will hit the spot for you and your family on this cold and snowy Thursday! 

 Today I'm sharing how to prepare a delicious and tender pot roast...

Here's what you will need for this dish.


You will need...
Onion
Potatoes
Carrots
Salt 
Pepper
and 
last, but not least...

a  boneless beef roast of your choice


Now, I shop for bargains and when buying my roasts whether beef or pork, I only buy them when I can get a good deal! You can always freeze them until you are ready to cook them! 


I also like to choose one with a lot of marbling (The white lines in the meat are fat! That means extra flavor!!)
You don't want too much, but you do want to see it.

Okay, now you are ready to get started!

I normally cook a beef roast in a Crock Pot.  
I will share that method with you real quick...

You take your rinsed beef roast and place it in a Crock Pot.  Sprinkle one packet of onion/mushroom dry soup mix (I use Lipton brand) over your roast. Add one can of Cream of Mushroom soup, one small drained can of mushroom pieces and one can of water over your roast and cook on medium heat until done. This will make a yummy roast with a rich gravy, if that's your choice!  

However, today I'm going to share a new way that I chose to prepare my roast and boy oh boy was it good!!

You will need a large cast iron or cast aluminum pot with a lid.


I got this one for Christmas from my hubby!  
I LOVE it!!!

I started by rinsing my meat and dabbing it dry with a paper towel on both sides.

Then, I cut an onion in large pieces and placed it in the bottom of my pot.  They will act as a base for my roast.


Next, I sprinkled my roast with salt and pepper on both sides and placed the roast on top of the onion.


Then, I placed the lid on my pot and cooked it low and slow for several hours.

I started out at 350 degrees for about one hour and then reduced the heat to 275 for hours, until it was getting fork tender, but still had a little cooking to do.  


This is when I added my carrots and potatoes. 
 I just used baby carrots and roughly chopped potatoes with the skins on...


I placed them all around my roast and put the lid back on my pot and returned it to the oven at 300 degrees until the veggies and meat were all fork tender.  
Doesn't this look so yummy?

Trust me... it was! 
It turned out to be so tender and juicy, but without the thick, heaviness of a gravy.

I chose to serve this wonderful main dish with green beans and homemade rolls.

Love on a plate <3

Now that's comfort food if I've ever seen it...

Let me share this easy homemade roll recipe too.

You will need...

1 Cup of Self Rising Flour
 1/2 Cup of Milk
3/4 Teaspoon of Sugar
and 
3 Tablespoons of Mayonnaise

Yep, you read that right... Mayonnaise! 


Blend all of these ingredients together and place into a greased or sprayed muffin pan.


Bake at 425 degrees for only 15 minutes!


These are super easy and are the perfect compliment to the pot roast!

I hope this meal will be just as comforting to your family as it was to mine... 

Stay warm and enjoy!!
 
~ John 14:27  "Peace I leave with you, my peace I give unto you: not as the world giveth, give I unto you. Let not your heart be troubled, neither let it be afraid." (KJV)


Thursday, February 12, 2015

Making A Family Favorite... Strawberry Jam

I can not believe it's already February!! Where in the world does the time go?!?
I hope all of you have gotten off to a good start in 2015 so far!  I apologize for getting behind on my blog posts.  I don't know how it happens, but before I know it, it's another month!! I guess time really does fly when you're having fun!

Speaking of fun... I spent last weekend having fun in my kitchen, making Strawberry Jam! This is a favorite in our house!


Let me share the recipe with you...

Here's what you'll need to get started:

 5 Cups of Crushed Strawberries
7 Cups of Sugar
1 Box of Sure Jell
Sterilized Jars
New Caps and Rings for your jars


When making jam, you always want to sterilize your jars, caps, rings and all your utensils that you will be using while making the jam.  

I like to clean one side of my sink really well and place everything that needs to be sterile in  the sink and cover everything  with boiling water until I'm ready to use it!


While that sits for a little bit, I wash my berries and look over them, making sure there is no mold or rotting whatsoever! 

**Note:  If you use berries that are near ruining or that have mold spores on or in them, your jam will mold inside of your jars!! This would be terrible!! Believe me, I know!! 

True Story...

I once went to a flea market/farmer's market in Tennessee when I was younger and this little farmer man was selling peaches.  I saw a great big box of peaches there beside his table and he asked me if I was making jam.  I said yes, I was making  Peach Butter.  He said, "Well, this is your lucky day, I will give you this whole box of peaches for a discounted price." He convinced me that the fruit was perfect for jam making because it was very ripe.  Well... he was right about needing ripe fruit, but about 1/3 of those peaches were starting to rot. 

I didn't know that mold spores travel from peach to peach just by a moldy peach being near the other  fruit, but that's what happened!  I picked out all the peaches that were moldy or soft and used the rest.  MISTAKE!! I spent my whole Saturday making Peach Butter for us and packed it up for gifts for the preacher and other friends at church! It was very pretty!  I handed it out on Sunday, but soon realized that my Peach Butter was moldy!! Big clumps of mold were in each jar!!  I had to call everyone and warn them not to open the jars!  I was devastated!! I had spent money on peaches, jars and sugar not to mention all that time!  I had to throw out every bit of it!! Heartbreaking story, I know!! :(

So... always be sure you choose good fruit!! 


Now, I remove the caps (the green leaves) from each berry and slice my berries into a large pot.  


Then, I use my potato masher to smash the berries until they are mostly smashed, with some berry pieces in there for a nice "jam texture". 

You will need to have about 5 cups of crushed strawberries in your pot.

Now, stir in one box of Sure-Jell into your fruit.

** I also like to add a half teaspoon of butter into the mix to help prevent foamy jam.  

Bring this mixture to a full rolling boil (a boil that doesn't stop bubbling when it's stirred).


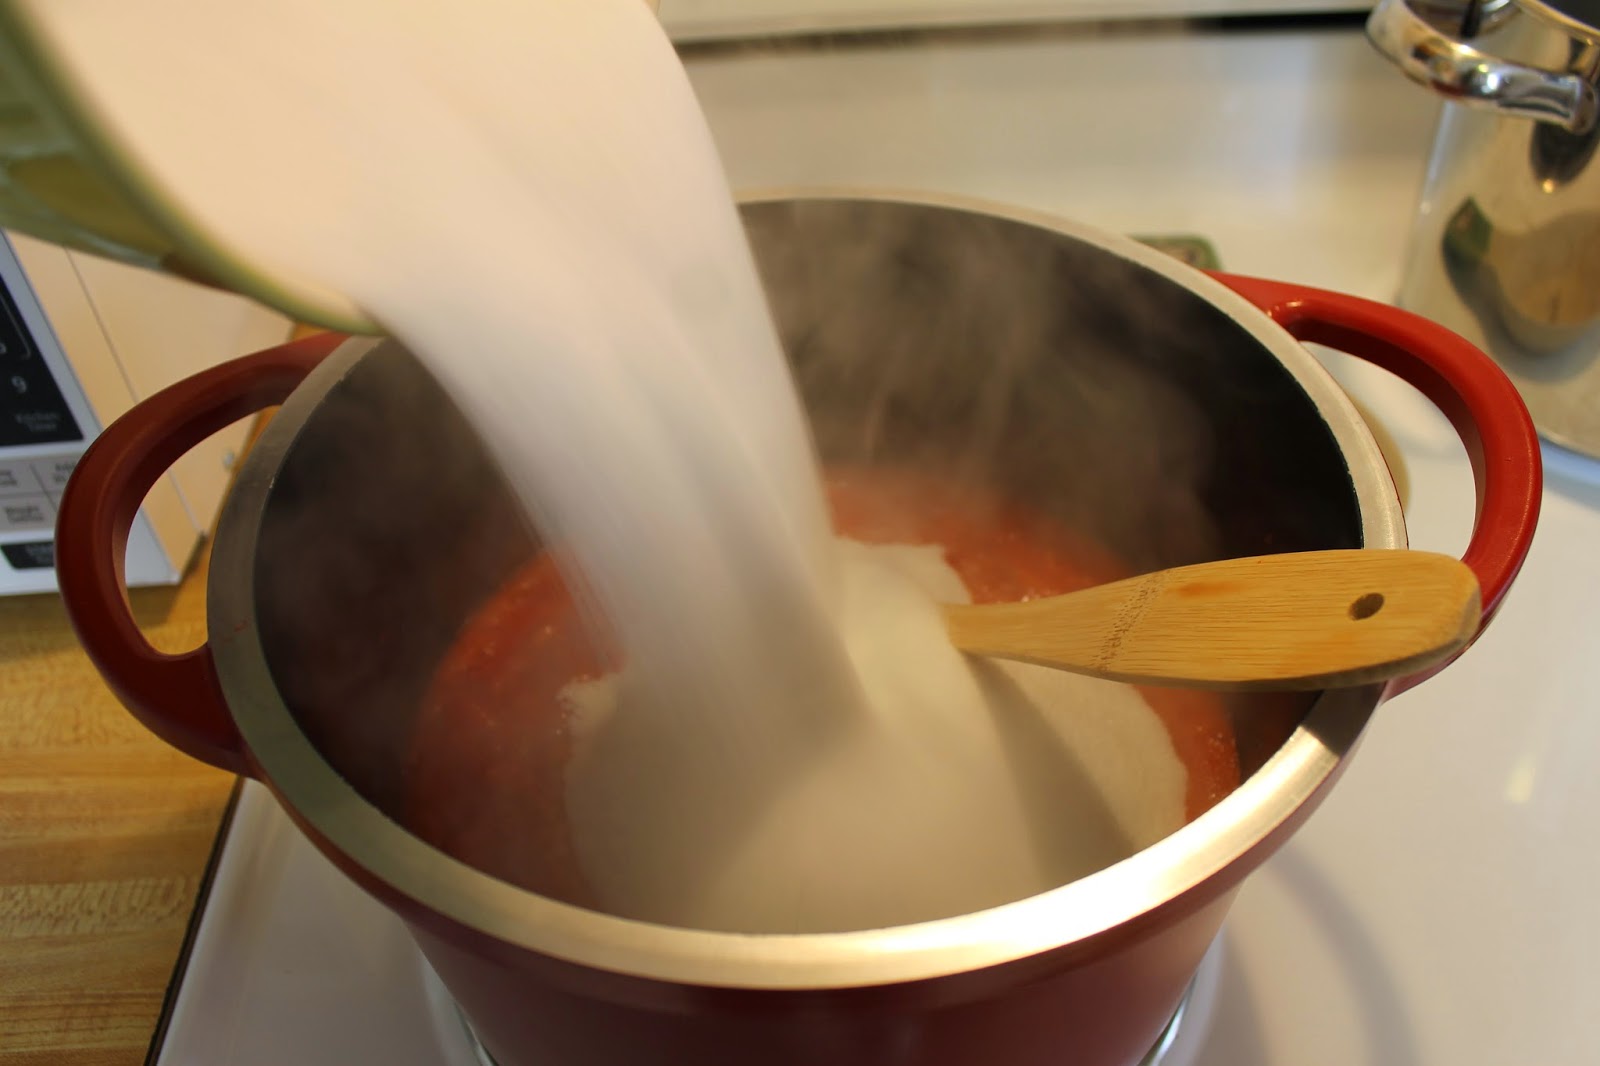
Make sure that you have your sugar already pre-measured and waiting for you to throw in all at once when it's time.  


Okay, once your strawberry/Sure Jell mixture has come to a rolling boil, add your sugar all at once to the boiling mixture.


Stir in the sugar and return the mixture to a full rolling boil.  Boil for exactly 1 minute, stirring constantly.  Be careful this is hot stuff and you can get splattered!

Once your minute is up, remove the mixture from the heat and remove any  foam from the top of the jam with a metal spoon.  


Now, you are ready to put your jam into your jars!! 


Seal your jars with sterilized caps and rings.  I always return my sealed jars back to the boiling water to sit in a "hot water bath" for about 10 minutes after they are sealed to assure they will seal better. 

Place your filled jars on a flat surface that is draft-free and wait to hear a "POP", "POP", "POP"!  Each "POP" you hear, lets you know your jars are properly sealed and ready to give away or be stored at room temperature until you're ready to open them!  


Such a beautiful sight!! <3


I want to share one more recipe with you while we are talking strawberries!

Let's make Strawberry Short Cake... 

Starting with the Pound Cake: 
 
I got this recipe from one of my Southern Living Cookbooks.  I love to make it!  It is very moist, but the outside has a delicious crust!  It's called "Crusty Cream Cheese Pound Cake".

Here's what you will need for the  Cake:

1 Cup of Butter (Softened)
1/2 Cup of Shortening
3 Cups of Sugar
1 (8 ounce) package of Cream Cheese (Softened)
3 Cups of Sifted Cake Flour
6 Eggs
1 Tablespoon Vanilla Extract


Start by creaming together your butter and shortening in your mixer.


I have to share with you one of my favorite kitchen tools.  It's this Pampered Chef measuring cup! It has a dry and a liquid side.  It's perfect for peanut butter and Crisco!  If you don't have one, you should get one!!


P.S. I have a friend who sells Pampered Chef and if you want to order one, let me know and I can give you her contact!

I also learned a new tip to remove Crisco and peanut butter from your measuring cups more easily... rinse your measuring cup first with water and don't dry it out.  When you go to remove your Crisco, it slides right out, cleanly! This works!!

Okay, now gradually add the sugar , beating well at medium speed. Add your cream cheese and beat until light and fluffy.


This is what your batter should look like.

In another bowl, sift your cake flour.  You MUST use cake flour!! It will be a disaster if you don't!  That's another thing that I've found out the hard way!! :)


Alternately, add your cake flour and eggs, beginning and ending with flour.  Lastly, stir in your vanilla.

This is a beautiful batter...


I like to use my Bundt Pan for this recipe...


Be sure to grease and flour your pan and then pour the rich batter inside your pan.


Bake at 325 degrees for 1 hour and 15 minutes or until done.  Cool in the pan for 10 minutes before you remove the cake from the pan.  

Now, on to the strawberries...


I wash, cap and slice strawberries and place them into a bowl and sprinkle with some sugar.


 Allow the sugar to dissolve and make a "syrup" from the juice of the berries and the sugar.  Just allow the berries and sugar to do the work there on your counter while your cake is baking.  


YUM!!!! The strawberries are ready!! 


When your cake is cooled, assemble your dessert and enjoy!!!


~<3~  I John 3:11  "For this is the message that ye heard from the beginning, that we should love one another." (KJV)